Click, click, thrash, click. That’s the sound you may hear coming from your hard drive that is about to fail. Not to worry, though; the following drive backup software recommendation will help you create clones of your critical data so that you can restore to a new hard drive quickly and easily.
This Mac drive backup software recommendation follows one principle: the software must be able to make a clone, or in other words, create an exact copy of the source volume. Without software that can create an exact copy, there is a possibility that critical operating system files, or worse, your personal folder could be overlooked. This is why systematic drive cloning is necessary for your data integrity.
Two drive backup software suites exist that will do just this. Carbon Copy Cloner by Bombich Software and SuperDuper by Shirt Pocket. Both are excellent disk cloning software choices; choosing one is a matter of downloading the free trials and selecting the drive backup software you prefer.
I’ll focus on Carbon Copy Cloner’s suggested settings because it’s the drive backup software I use on a daily basis.
Carbon Copy Cloner: An Overview
Carbon Copy Cloner is my personal favorite because it just works. Its user interface is simple to understand and making changes to your backup settings feels natural. The primary developer regularly pushes updates to the software to keep it current with the latest OSX milestones and is always refining functionality to make it even better than the last version.
Carbon Copy Cloner (CCC) was once free software with advertisements embedded in the backup window, but that model has recently changed. Now, Bombich offers a paid version with a trial period long enough to thoroughly evaluate the software.
One of the features that has me hooked on Carbon Copy Cloner is its ability to calculate CRC checksums on both the source and destination volumes during a backup. Doing this verifies that the data on the source is exactly what is copied to the destination, bit-for-bit. The backup time increases with this option selected so you may want to run a CRC checksum once per week instead of every night.
Note, these are my settings; there are other ways to configure Carbon Copy Cloner so if you’re looking for something a little different, like archiving old file versions, experiment with the software so that it will meet your needs.
I have also included screenshots of my Carbon Copy Cloner settings for the visual people in the group. This should help you configure the drive backup software without needing to read the entire article and provide guide posts so you know where to make changes.
Let’s jump into the software and take a look at how to set it up…
CCC: The Console
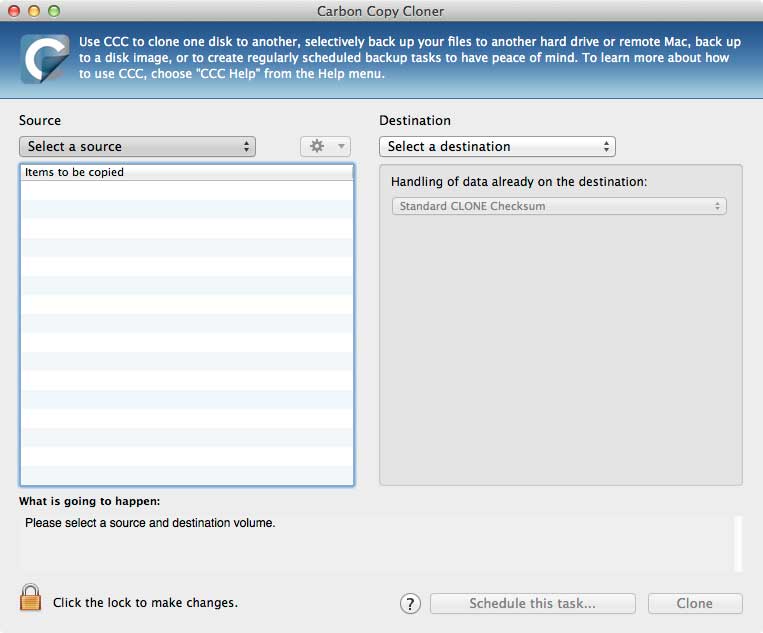
Once the application launches, you’re greeted with the console view. This is where you can make one-off backups on-demand or is the starting screen for getting your backups scheduled to run systematically.
Two drop-down lists are enabled: the “Source” and the “Destination.” Handling of data and scheduling options will enable once source and destination drives are selected.
CCC: Selecting Source and Destination Volumes
To get started, select a source volume from the drop-down. Here, I’ve selected “Boot,” which is my operating system and applications hard drive. I have also made sure all my data is selected (you can do this by choosing the highest level check box if it isn’t already selected). Now, select your destination drive; I selected an external hard drive by the name of “CLONE-Boot-Onsite.”
Now that you have your source and destination selected, the next step is to choose how Carbon Copy Cloner will handle the data already on the destination. Hit the drop down and choose “create a new preset.”

CCC: Choosing Clone Settings
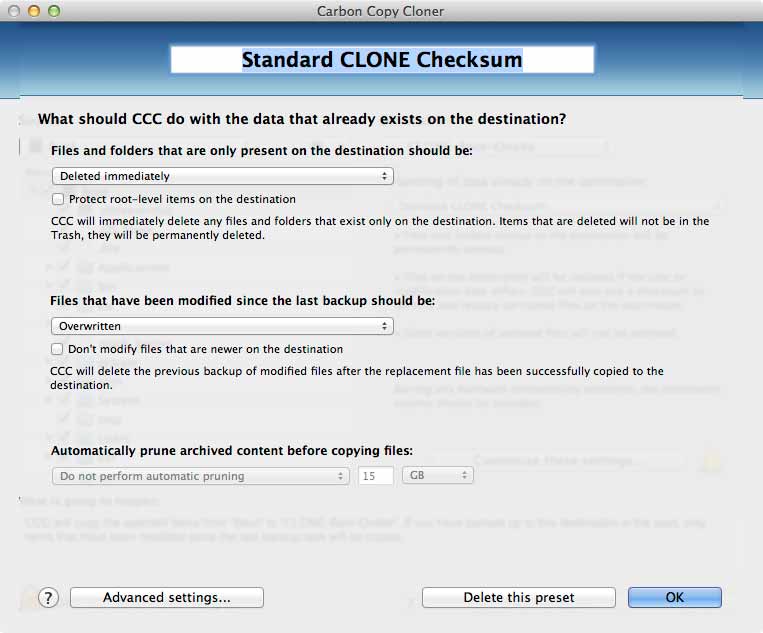
Name your preset with something descriptive so you know what it does if you reference it in the future. I like to perform a checksum clone at least once per week to verify the destination’s data. This step will make sure the copy is bit perfect. Here, I’ve created a preset named “Standard CLONE Checksum.” Here’s what you need to select for mimicking this backup type:
- For “files and folders that are only present on the destination,” select “Deleted immediately” and uncheck “protect root-level items on the destination.”
- For “files and folders that have been modified since the last backup,” select “Overwritten” and uncheck “don’t modify files that are newer on the destination.”
- Do not perform automatic pruning.
Now it’s time to modify the advanced settings and complete this new preset.
CCC: Advanced Clone Settings
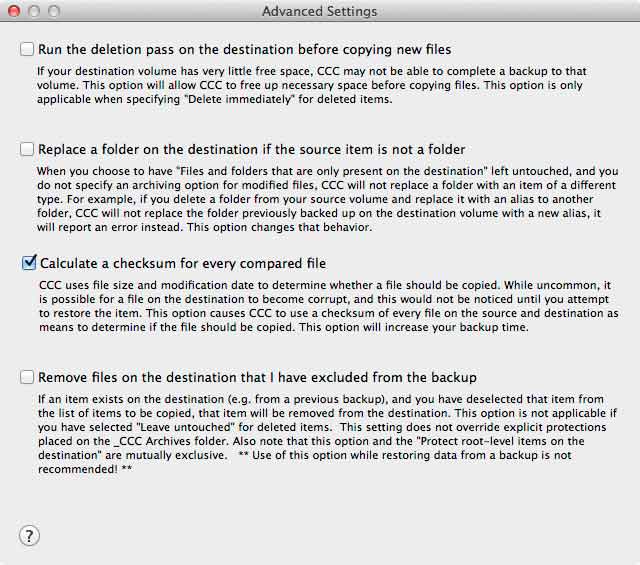
Go ahead and click the “advanced settings” button inside the new preset window you’ve been setting up. This is the place where you have the option to fine tune your clone. To enable CRC checksum verification, click the checkbox near the “calculate checksum” option. That’s it. Close the advanced settings window and click “okay” in the preset window.
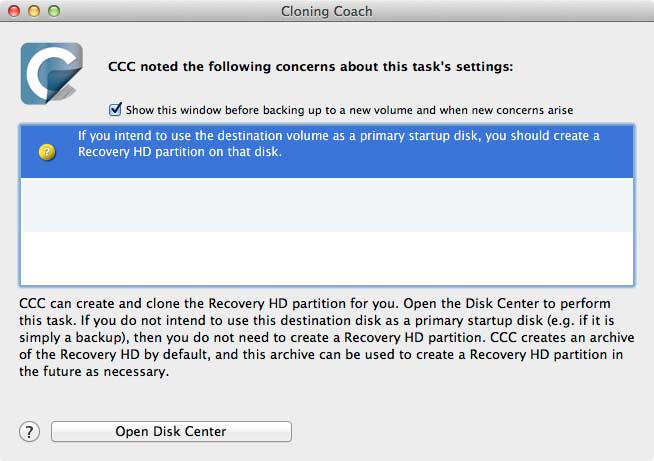
A yellow triangle with an exclamation point may be next to the “customize these settings” at this point, but not to worry; click it and read its details. The Cloning Console Coach is here to provide feedback on the settings that have been selected.
Here, it suggests that I should create a recovery partition because I’m creating a bootable backup, however, since this is a backup and not my primary boot device, it is not necessary; I can safely ignore the suggestion and move on. Good to know, though…
Next, you’re ready to set up the scheduled task for your CRC checksum clone.
CCC: Scheduling Your Drive Backup Software
Now that you’re back to the main console screen, click the “Schedule this task…” button. This is the scheduling page (the shortcut is ‘Command + S’). Name your task with something descriptive like “Clone Boot to Onsite.”
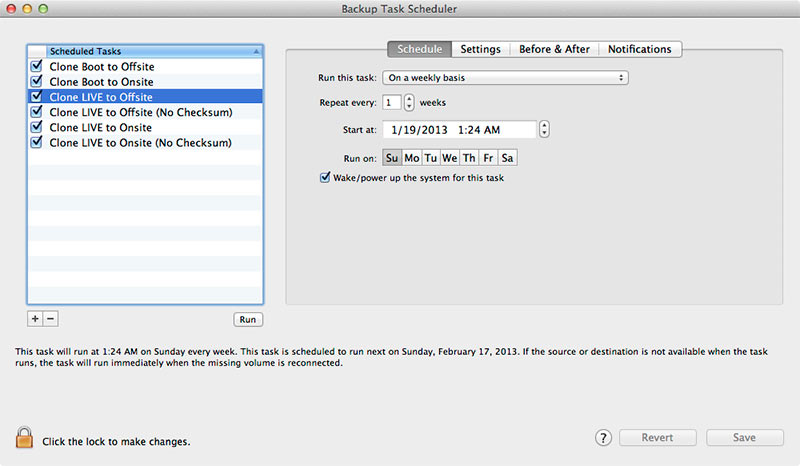
Let’s set up the ‘Schedule’ tab first. Since this is a CRC checksum disk backup, I like to only run this once per week because it takes longer to complete. I chose “on a weekly basis” and repeats every 1 week(s) on a Sunday at 1:24 AM. Don’t ask why I chose 1:24 AM because I have no clue what prompted me to use this random time. Do make sure you have the “wake/power up the system for this task” checkbox enabled if your system ever goes to sleep.
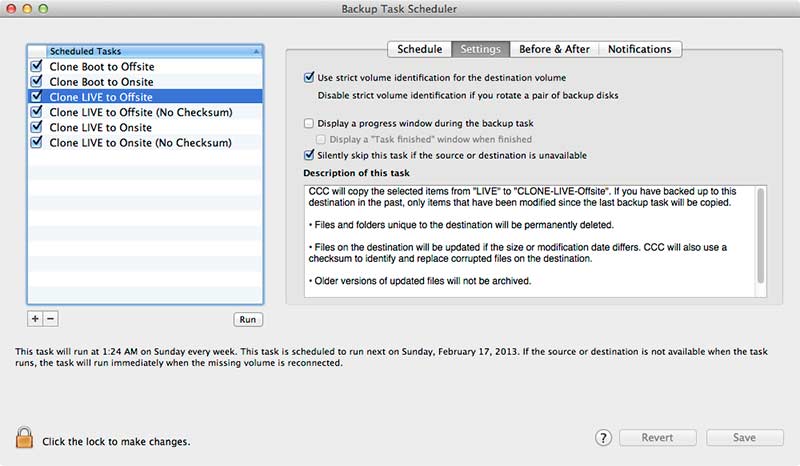
The ‘Settings’ tab provides disk options for this backup. I chose to “Use strict volume identification for the destination volume” because this is a single disk backup with no rotation. Just to give you an idea what Bombich means here… A RAID 1 array (mirroring) can technically be rotated by swapping a third hard drive out for off-site storage; you’d want to disable strict volume identification in this instance. I also like to silently skip the backup if the destination isn’t available only because I like to actively power on/power off my backup drives at certain times. If you feel you’d forget about backing up, don’t do this.
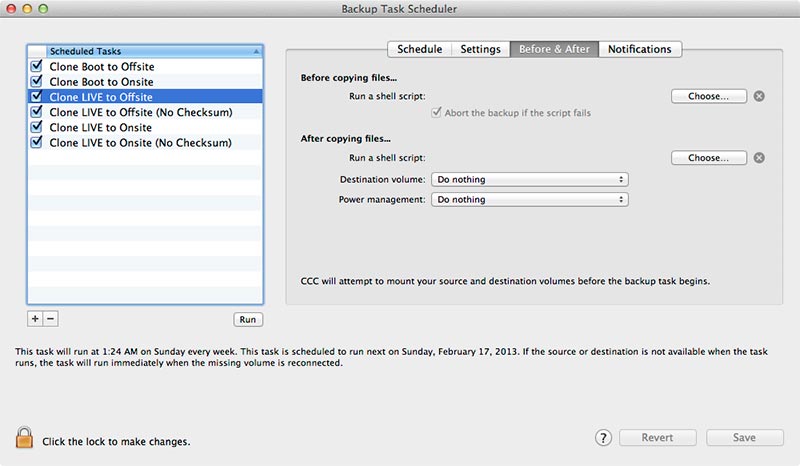
The ‘Before & After’ tab is a feature I don’t use at the moment, but can give you the ability to create shell scripts that run before and/or after the scheduled backup task.
You might create a tarball archive of your website and rsync that new backup to your local drive before running the task. Or, push an archive of some important data to cloud storage after the backup is complete. The sky is the limit here and your drive backup software scheduled task is open to your imagination and shell scripting skills.
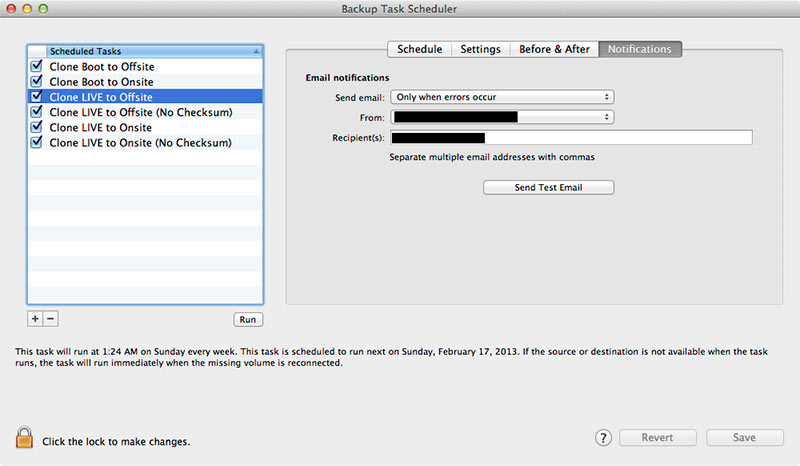
Lastly, the ‘Notifications’ tab. This feature is priceless because you will know real-time if the drive backup software fails wherever you are in the world (assuming you have a smart phone and internet connectivity).
Set up your email address and choose the type of notification you’d like to receive. If you chose to receive emails for errors and you actually get one, that’s a sign your drive is at risk and should be replaced. This information is invaluable. Test your email notifications and use it for all your backup tasks. Click “Save.”
That’s it. Your backup task is ready to run. You can create as many tasks as you’d like, but the next one I would recommend you create is a nightly backup without CRC checksum selected excluding the day of the week the CRC checksum task runs.
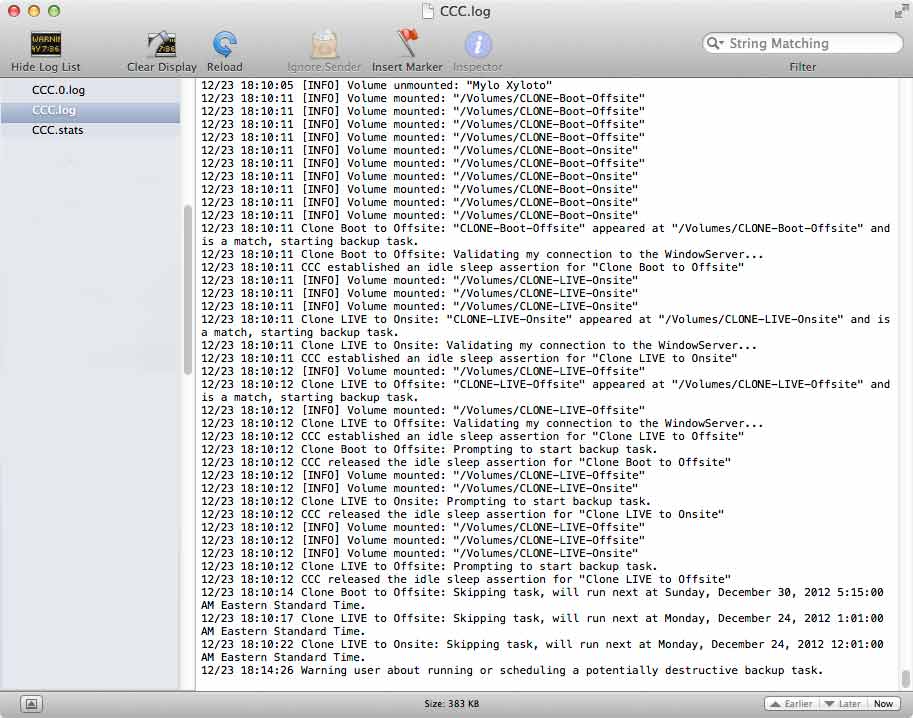
CCC: Drive Backup Software Log
Want to know what has been happening behind the scenes with your drive backup software? There’s a place to check that, too. Carbon Copy Cloner writes its operations to the Console whenever it performs a task. Simply open CCC, navigate to Window–>CCC Log (‘Command + 3’ is the shortcut).
Mac Drive Backup Software Closing Comments
I hope you found that this drive backup software article is a great resource for setting up Carbon Copy Cloner in the same fashion I use it. I also hope you will find peace of mind for your data by using a backup software suite, whether it be Carbon Copy Cloner or something else on the market.
Nothing is ever complete without actually testing your backups so please make sure you do that from time-to-time. If you created a bootable clone, test that you can boot with it so you know you’re covered in the event of drive failure.
And remember, Carbon Copy Cloner is very customizable and if you feel that your needs are different from the settings I provided, by all means change them. But, test them once the change has been made so you are 100% sure you have what you need. Good luck.
Return from Drive Backup Software to Learn Photography